Wednesday, March 31, 2010

Day 12


Day-11

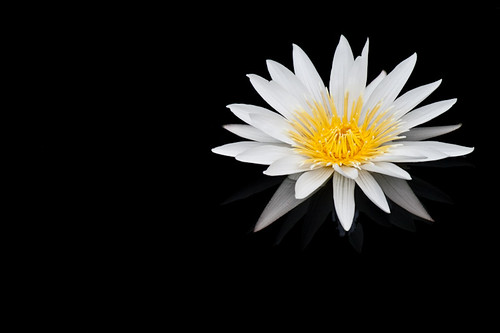
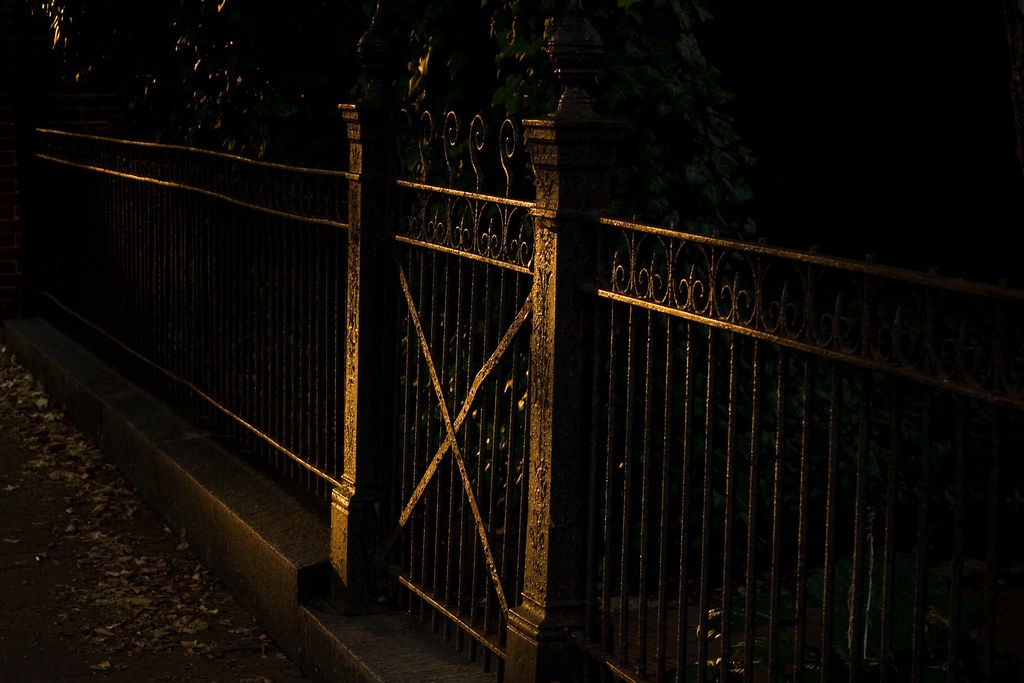
Today I needed every excuse possible to get out in the sunshine. I went out for a short walk on the school campus and found this photo waiting for me.

Things I’ve learned: This was one of the last photos that I took before heading back inside. I took it more as a “just one more shot” feeling, and it turned out to be “the” shot. I’m glad that I did that. Never underestimate that last “for good measure” effort. It might be your best.

Canon 30D w/70-200mm f/4 @200mm
f/6.3
1/500th sec
ISO 100

Tuesday, March 30, 2010

Day 11


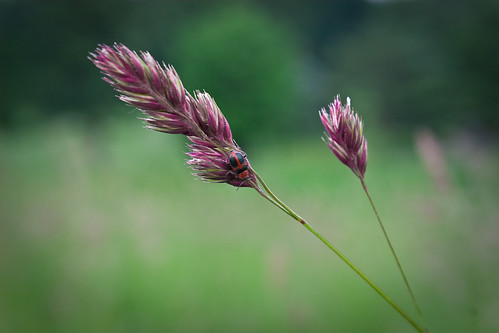
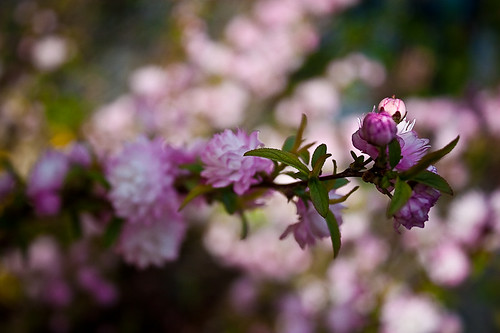
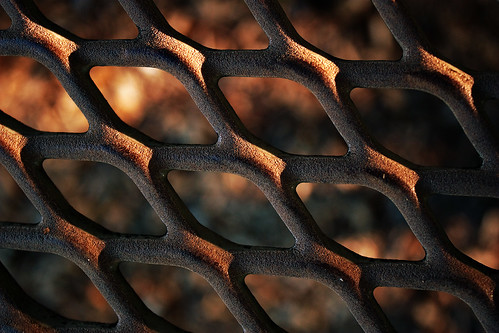
This photo pretty much sums up the weather today. I like how the colors show through though. The colors remind me that there is hope beyond the dreariness. Probably a great thought for this Easter week, and as we approach Good Friday. Despite Christ's torture, suffering and death, he understood that there was hope beyond it all.

Things I've learned: There are lots of things around my house to photograph. Sometimes I get lost in the idea of traveling the world and photographing things, when in reality, there is plenty around here to see. I just need to look harder.

Canon 30D 50mm f/1.4 lens @ 50mm
f/2
1/60 sec
ISO 800

Monday, March 29, 2010

Day 10


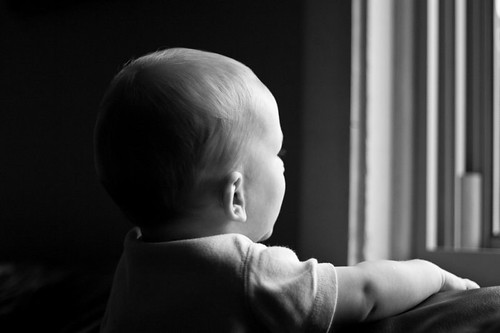
This is Isabel at 3 weeks. I had another photo that I was planning to use, but this one was too irresistible for me to pass up.

Things I learned: Earlier I found myself frustrated with my camera because I had the shot envisioned in my head, but I was too impatient to stop and think of how to get it. Thus, I missed a few opportunities. Patience plays a big part in achieving your vision. Now I have to remember that.

Canon 30D 50mm 1.4 lens @ 50mm
Aperture: f/2
Shutter: 1/250
ISO: 800


Sunday, March 28, 2010

Day 9


Today was Palm Sunday. Our church handed out these crosses made of Palm Leaves made by Africans as part of a missions project. The Africans make these crosses to earn money to feed their families. 

What I learned: Another difficulty of the 365 project is to remember that I need to take a photo each day. I'm eventually going to mess up somewhere and forget, or be put into a situation where I don't have my camera to take the shot. I'll have to deal with that when I do, but for now I'm happy to have a week's worth done. 51 more weeks to go.

Canon 30D 70-200mm lens @73mm
ISO: 250
Aperture: f/4
Shutter: 1/25 sec

Saturday, March 27, 2010

Day 8


This picture was taken today at a birthday party. The theme was baseball. They had hot dogs, popcorn, and even a baseball pinata. Everyone had a good time.

Things I've learned: I'm really starting to enjoy my 70-200 f/4 lens a lot. Even in less-than-ideal lighting, I'm finding that I can get some pretty sharp photos with burst mode. It is really great for capturing candids at events like parties without getting in everybody's face. 

Canon 30D 70-200mm f/4 lens @ 131mm
ISO: 800
Aperture: f/4
Shutter: 1/160th


Friday, March 26, 2010

Day 7

Day-7

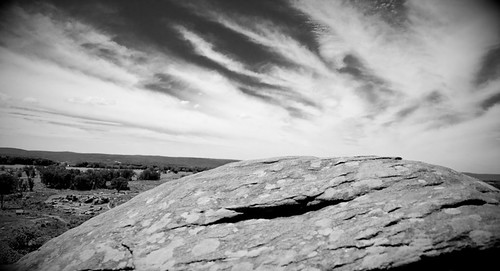
I remember back in High School that my teacher taught us about clouds. He taught us that if you look into the sky and see several different types of clouds, that it indicates a shift in pressure. We just enjoyed a few days of 60 degree temperatures recently, and now the prediction is a possibility of snow overnight. I’d say that’s a shift in something. Either way, I hear that there are 70 degree days approaching for next week, so I’m looking forward to that.

Things I’ve learned: Wide angle lenses are fun to use when shooting pictures of skies and landscapes. I even think that exaggerated perspectives that wide-angles can give are worth the use of one now and again. I also learned that my camera sensor is extremely dirty, because when I use apertures around f/8, then I see all kinds of spots on my images, which I have to clone out. Gotta get that sensor cleaned.

Thursday, March 25, 2010

Day 6

Day-6

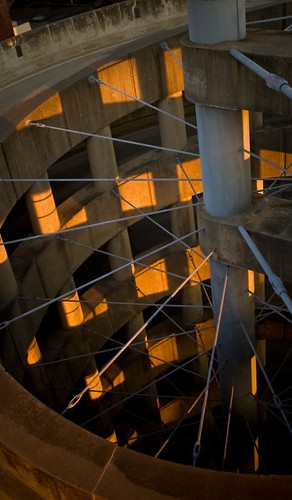
Today when I was scavenging around for a photo, I found a really neat piece of artwork that a senior had done. I thought it was really neat, so I took some photos.

Things I learned: Even though I thought the art work was really neat, I most enjoyed the details and the textures of the piece itself. One of my favorite things to do when taking photos is to find curious details and highlight them. Sometimes deconstructing the scene can be more fun and visually appealing than the scene itself (although I still thought the whole art piece was cool).

Canon 30D 18-55mm IS @ 33mm
Shutter: 1/15 sec
Aperture: f/4.5
ISO: 800

Wednesday, March 24, 2010

Day 5

img-5

This is a shot of my wedding ring, which is very special to me. I will have owned it for 10 years this coming June. I could probably take a bunch of photos of just thing ring alone, I like it that much.

Things I’ve learned:
Probably one of the greatest challenges for me in doing this 365 photo project is going to be answering the question, “So what do I take a photo of today?” Finding inspiration can be very difficult to do each and every day, but that is one reason why I am doing this project. I want to be able to push myself to new levels with my camera. On a technical note, this picture was shot using a reversed 18-55 kit lens as a macro shot. The shot wasn’t working out with the lighting until I used an external flash bouncing light from the ceiling.


Canon 30D 18-55mm IS lens @ 55mm (reversed)
Aperture: 0
Shutter: 1/125
ISO: 400

Tuesday, March 23, 2010

Day 4


I've been wanting to get this shot for a while now. I've seen this tree on my commute to work, and right away I knew that I would need to get a picture with it. I really want to explore different angles and perspectives with it, but time and circumstances make this difficult. You may see this tree again in some future shots. I've got other ideas, and the sky won't always be the same.

Things I've learned: Sometimes I need to put aside my laziness and just stop the car and get the picture I have in my head. I do a lot of scanning while driving and a lot of the time I'm inspired, but too lazy or whatever to just do what needs to be done to get the shot. I'm thinking that if I can overcome this I might be able to get a lot more of my vision into my shots.

Canon 30D 18-55mm IS @55mm
ISO: 100
Shutter: 1/1600 sec
Aperture: F/5.6

Monday, March 22, 2010

Day 3

Day-1

This photo captures pretty well what I do all day at work. My 13” Macbook Pro takes a beating both figuratively and unfortunately, literally. I’ve actually had it fall out of my photo backpack 4 times due to my own stupidity. The only damage it sustained all four times were some dents and scratches. It is an amazing machine and I would recommend one to anybody.

Things I learned: I love to get close to subjects with my 50mm lens, but it has a limited focusing distance, which makes it difficult. I had to get back about a foot or so to capture what I wanted. Sometimes this does get frustrating when I would like to be closer. I’m actually considering picking up a close-up filter for my canon gear, which would allow me to do Macro when I feel like it without purchasing a dedicated macro lens.

Canon 30D 50mm F/1.4 @ 50mm
F/2.8
1/320 sec
ISO 1600

Sunday, March 21, 2010

Day 2


Today's photo is, like probably most of the photos on the blog for the next year, is completely random. I didn't even notice this airplane, except that my 2-year old son was excited enough to point it out. Thankfully, I still had my 70-200mm lens mounted, and was able to grab a shot as it flew overhead.

Things I learned: Grab shots are fun, but they aren't always the best way that I like to make photos. I enjoy being prepared and somewhat cognitive about my photography. The only thing I do feel that I did purposely for this photo was the actual composition. However, sometimes the best shots are not the ones we plan to make, but that happen in front of us in the moment.


Canon 30D 70-200mm F/4 @ 200mm
1/4000 sec
F/4
ISO 200


Saturday, March 20, 2010

Day 1


So, for my very first post, I thought that it might be good to get a photo of our new baby, Isabel. Her birth this year will probably be my most memorable event of Spring 2010. 

What I've learned: One recent thing I've learned is that if you want a shot at an exposure that is slower than you can hand-hold, if you fire off shots in burst-mode, sometimes you can get a sharper shot from one of the bursts. The lens that I used with this shot was my 70-200mm, and it only opens up the aperture to F/4. To get an adequate shutter speed for non-blurry shots, I need to usually have the shutter speed at 1/320 of a second or faster. Fortunately, shooting in burst mode allowed me the option to capture the shot a little better without a wider aperture or adding more light.

Shot with Canon 30D w/ Canon 70-200mm F4 lens @ 126mm
Aperture:F/4
Shutter: 1/50 sec
ISO: 800


I've got a project, and I need your help.

So now that I know some of you are actually reading this blog, I've endeavored to find a good series of topics to post on. After much deliberation, I've come up with an idea: A 365 Photo-a-Day project. I've been wanting to do this for some time, but didn't know how I could keep myself accountable. That is where you, my readers, come in. If I am not posting regularly, please give me a poke in the ribs in the comments. I've heard that this kind of project can be difficult to keep up, which is why I'll need your help.

 I'm going to be posting a photo a day with a little background on each photo. Probably most of the pictures won't be too inspiring, but the idea is to keep shooting, and from this process I will also be sharing what I've learned along the way. Perhaps you can glean something from this journey too. Anyways, I'm going to go out today and get a shot of something, so be on the lookout for something to kick off 3/20/2010.

Friday, March 12, 2010

Is anybody out there?

This is just a test post to see if anybody actually reads the blog anymore. I need feedback people. If you are reading this blog, please drop me a comment so that I know. I've not updated it in some time because of my assumption that everyone has fallen into the Facebook abyss. :-)

Tuesday, July 21, 2009

Photography Tip: Seeing Creatively

One of the most popular debates going on right now in the world of photography is the question of "Can you teach vision and creativity?" A few books have been written on the subject, including one by Bryan F. Peterson called "Learning to See Creatively". By his book, Peterson is obviously a believer that one can be influenced to see things in our world to enhance one's vision. I don't know exactly where I fall on this subject, but I do know that I have grown in my ability to look beyond what is there and find more interesting things to photograph.

A great way to change the way you see things is to learn about some of the basic elements of design, such as line, shape, color, texture, etc. Looking for these things in any environment can open up to a whole new world of photography for you.

I recently took a trip to Gettysburg National Park with a group of students and a teachers. One of my goals was to find a moving photo that spoke of patriotism and defined freedom. However, in the midst of the trip I found this assignment not suitable for my mood at the time and wound up doing just the opposite. My new goal was to capture elements of the oft-photographed Gettysburg which are not usually seen. To do this, I had to force myself to look at a scene and break it down. To look at the lines and the shapes I saw. To analyze the color and mood and determine if a photo might look better in black and white than in color. These thoughts helped me to take photos much differently than if I were just trying to take pictures of Gettysburg.

You may believe that you are not creative, or maybe you struggle to look at things in a new way. A little study and education in this area can go a long way for helping you obtain more ability to "seeing". For your next photo excursion, try looking at things in a new way, change your perspective, look for colors and textures. These things can really change the game for you and your camera.

Monday, June 29, 2009

Photography Tip: Give yourself assignments

It seems that sometimes picking up the camera and taking pictures can feel like picking up a 20-ton block when you're not motivated. Motivation can play a key role in helping you to take better pictures. One of my biggest gripes about my childhood photos is that they all seem to be holiday and vacation photos. My family members weren't really motivated to take pictures any other time.

One great way to keep your eyes looking and get good inspiration is to give yourself assignments. My photography students have a tendency to groan when we tell them their "themes" for the day or week. This is probably because they are lazy, but I digress. Giving yourself a theme, such as something like the color red, can really change how you see things. All of the sudden the color red shows up everywhere. Kind of like when you get a new car and all of the sudden you notice that everyone has the same care you do. Experiment with different assignments such as colors, numbers (ie; sets of 3), and other themes of interest to you. Try to start off with something simple. A complicated theme that is too challenging might discourage you at first, so it is better to keep it simple.

If you are looking for some ideas for a theme to take pictures and can't think of any, try one of these:

Letters-go on a nature walk with your camera and see how many letter of the alphabet you can find in nature (such as a branch in the shape of a "Y")

Numbers- Look for sets or groups of things in numbers.

Colors- Pick a favorite color and try to find as many things as you can with that color.

Don't forget to be creative with your theme. This can be a lot of fun too.

Wednesday, June 03, 2009

Getting Flashy with Flash Exposure Compensation


While it is true that natural light makes photography a whole lot easier to use (most of the time), there are times when you must choose to find another light source, or just plain put down the camera and give up. Many people find flash photography very unappealing and try to avoid it at all costs. This is rightly so, since, if used wrongly, the built-in flashes on most cameras can turn a calm beautiful picture into a promo poster for Tales from the Crypt with red-eye and ghostly white skin.

There is however, an option on many cameras that can allow you to actually control the camera's flash power, called flash exposure compensation. This option can turn a horribly overpowering light into a soft burst that gives just enough light to illuminate the subject well. Since many cameras vary on where this option is, I would consult your manual on how to adjust it. Most all cameras offer flash compensation control from -2 ev to +2 ev. The negative numbers cause the flash to emit less light while the positives will give you more. The subject distance and ambient lighting in your situation will dictate how well this will work for you. Of course, the best thing to do is to find this setting and try it out for yourself. I suggest experimenting with the different EV levels and taking note of how the changes affect the light on your subject.

Have more questions about photography or cameras that you'd like me to address? Let me know in the comments.

Wednesday, May 27, 2009

What is White Balance?


Have you ever taken photos indoors only to look at the photos and find that they all came out orange or sickly-yellow? Or how about a bluish-green? If so, then you've been stricken by the dreaded effect of an incorrect white balance setting.

Just what is white balance? Well, in simplest terms, its how your camera interprets what white is under whatever light condition you have. Many of us do not notice the effects of white balance with our eyes, because our brains are able to decipher what color white is in subtle lighting conditions. Our cameras on the other hand, don't always do this so well. So how do we fix this? Well, fortunately, we have sophisticated cameras with the ability to interpret white if you give it a clue. To do this, you need to find the white balance setting in your camera. sometimes it may be a button and sometimes it may be in your menu of your camera. Usually it is found with initials like "WB" or something similar.

Once you find this setting, you can be given many options. Here are a few of them for you to understand how they affect your photo:

Auto White Balance:
This is what most cameras are set to. For the most part, the camera does a good job. But usually it will struggle under incandescent or fluorescent lighting. This is usually when you need to change it to something more specific.

Incandescent:
This usually has a light-bulb symbol to represent it. It generally will add a blue tint to your photos to help balance the yellowish tint given off by most incandescent lighting, thus getting rid of the yellow color in photos.

Fluorescent:
This will off-set the bluish color of these lights to balance the whites.

Shade or Cloudy:
Symbol that looks like a small house with a triangle next to it or clouds. This will warm up a scene by adding a bit of orange or yellow to it to balance the white. This setting has an extra bonus if you want to add warmth to a photo on an overcast day.

Flash
Attempts to balance out the harsh blue color of your on-camera flash.

My best advice if this seems confusing is to find this setting on your camera (every digital camera has this option somewhere) and switch it to the different choices and observe the differences. Sometimes a little experimenting goes a long way. Even better, once you better understand how white balance works, you can use it to help you make more creative photos as well.

Friday, May 22, 2009

How to take Better Pictures of Children


If I could guess on what the most popular subject in most people's photos is, it is probably children. Aside from the fact that they are cute 100 percent of the time (especially your own), they are constantly growing and we want to capture every second of the process before they grow up to be snooty teenagers.

To get the best photos we can of our children, there are a few guidelines and tips that we can follow to make the results more enjoyable and also to help us keep our sanity:

1. Patience- Probably one of the biggest things to have when doing just about anything with children. Kids don't photograph too well when you force them into it. They don't want to hold still. They are kids. Your job is to keep them in their element and then get the shots that capture that mood. If you lose patience, then you are going to be miserable every time.

2. Build Trust- This is probably easy with your own kids, but other people's kids are not going to be natural around someone they don't know or are wary of. You can build trust with a child by speaking to them in a friendly, not asserting tone. Unless you're going for the "I don't think I trust you" look, then you might want to take the time to get to know the kids before chasing them around with your camera.

3. Get down on their level- Let's face it. As adults we seldom see children from any angle but from above them. Shooting down on children emphasizes their smallness, but in some cases can make a boring or uninteresting photo. Try getting down on your knees and capturing them in the world as they see it, or even better, get down on the floor and shoot up at the kids. This exaggerates their size and makes them look tall and "in charge", which is a perspective many people never see.

4. Try not to invade their space unless you are invited- If you are shooting a child that doesn't know you well, it might be best to keep a good distance from them and take your shots. Most kids will give you more personality to photograph if you let them play and do their thing. Jumping into their world uninvited may not only make them feel awkward, but also change the way they present themselves in front of a camera (see #2).

5. Know how to use your shutter- Unless you are photographing newborns, chances are that kid is gonna move. And boy do they ever! In these cases, you will want to use the fastest shutter that your camera will allow in the light that you have to freeze their actions (if that is your goal). Outdoors, I recommend at least 1/250th of a second or more. Indoors, I would try to keep it near 1/125th of a second or faster if you can. Sometimes the light situation won't allow this without flash, so be prepared to deal with that as well.

6. Have fun!- I admittedly forget about this tip most of the time. I get so caught up in trying to get good shots that I tend to remove myself from their activity. The next thing you know, they are bored and you are frustrated. Kids love to play. Sometimes they require you to be a part of that play. Who knows, you might have so much fun that you might forget about pictures, which isn't always a bad thing.

Tuesday, May 19, 2009

How to Get Blurry Backgrounds in Photos?


Probably one of the most popular requests of anyone who picks up a camera is that they would like to take a photo of someone or something, and blur the background behind it. Why do we like these kinds of photos? Probably because the blur helps to isolate the subject in the photo and make it stand out, or pop.

Unfortunately, due to lots of technical factors involved in doing this technique, a lot of people find it difficult to do. Here are a few tips that can help you get this effect in your photos. Keep in mind that some of these things may not be possible with your camera, so your mileage may vary:

1. Open up your aperture as wide as it can go

The wider your f-stop, the shallower your depth of field is and the easier it is to blur backgrounds. Photographers call this "shooting wide open". The key is to make your f-stop as small as a number as your camera or lens will allow. I suggest changing your camera to Aperture Priority mode and dialing down the aperture number and giving it a try. If you don't know what Aperture is, see this post.

2. Zoom-Zoom!

Another way to get blurry backgrounds is to zoom out as far as you can with your lens. There is a relationship between aperture and zooming that makes this possible. So if you have your aperture as wide as it can go and you are not getting the blur behind your subject, then make sure you are zoomed out as far as you can go, then step back and refocus.

3. Get Close and Focus Close

This one is simple. If you have a flower, or something nearby, get as close to it as you can and focus on it. As long as there is something not too close behind it, the background should at least fall out of focus.

4. Create Distance between your subject and the background.

If you are shooting a portrait shot near a wall, try to get the person away from the wall. I find that about 8 to 10 feet in front of a wall is a good distance to help me blur the wall behind the subject.

Keep in mind that the above tips can be used in conjunction with one another, so play around with the tips and experiment to see if you can get what you want out of them.

Last tip: About Point-and-Shoot Cameras

If you don't own an SLR camera and you might find that some of the above tips are not working. If this is the case, then you may have run up against some of the limitations of a point-and-shoot camera. The biggest limitation has to do with the internals of the camera: the sensor. Point-and-shoot camera sensors are very tiny in comparison to digital SLR sensors and therefore, due to some physics, do not achieve a shallow Depth of Field as easily as a larger SLR sensor. Sometimes this isn't the case, so again, your mileage may vary. In any case, I have personally been able to achieve nice blurred backgrounds using a point-and-shoot, so it is possible.

To all of you, let me know if any of these tips help you, or if you have any questions or comments feel free to leave some.

Sunday, May 17, 2009

Photography Tip # 12: Get some direction

Thus far we have looked at 2 main facets of light that are of major concerns to getting good photos. We first looked at quantity, and how we should always consider how much available light we have and how to work around not having enough. Our second consideration was light quality and how we should consider the kind of light we are shooting in, whether it be the light of midday, indoor light, etc. Our last item on the list is Direction.

By being aware of the direction of your light source, you can always use the light to your best advantage. Keep in mind that the sun does move around in the sky. A shot on the beach at 8am is going to look different than a shot on the beach at 12pm, etc. And then there's the question of a beach in Florida or a beach in California. The point here is the direction. If I shoot a picture of a person with the sun behind them, they will most likely be a silhouette. If I shoot a picture of a person with the sun behind me, they might be squinting and grimacing in the shot. In these situations, try to put your subject in a position where the light is still illuminating them (perhaps from the side) but not interfering with ability to see and be comfortable.

Indoors, its always good to utilize natural light, if possible. The most common and favorable indoor light source would be a north-facing window however, I've found that as long as the window is big enough and enough light gets in, then it doesn't matter. The key here is to consider the direction of the light and how it falls on your subject.

This concludes the series on light. The next several posts will concentrate on common "how to" questions that most people have when using their camera.

Wednesday, May 13, 2009

Photography Tip # 11: Quality is your first priority

Okay, so maybe it isn't. But when it comes to light and photography, perhaps it should be. When a photographer talks about the quality of light, what they are usually talking about is the temperature or color of the light. Good quality light is generally a focus of landscape photographers, but it can certainly be used to the advantage of any photographer in making an image.

Good quality light can usually be found naturally from sunsets and sunrises. However, sometimes after a passing storm at the end of the day, you'll find the sky lit up with beautiful orange or pink clouds, which turns everything into a giant glow of warm and comforting colors. The next time this happens, "Get thee thy camera and runneth thyself onward!" Or in other words, go take some pictures. Quality light is worth waiting for, so if you want it, be willing to get out there during the "golden hours", which is the hour or so before dark or after the sunrise.

So what is low-quality light? Well, truthfully, beggars can't be choosers, so if you just want to be able to take photos, all light is your friend. But the worse times of the day to get soft and colorful light would be at night (duh), or during the harsh lighting of midday. This is when the light is the most direct and (blindingly) brightest and colorless.

So the next time you are planning on shooting, keep in mind the quality of the light that you are working with. You might just find that good planning will really pay off.

Tuesday, May 12, 2009

Photography Tip # 10: Quantity is important

I think that because the concept is easy to understand, many people seem to gloss over at the mention of quantity when it comes to light. I mean, it is pretty obvious that you need to be able to see to get the shot you want. However, what people fail to remember is that the camera does see differently than your eyes do.

Our eyes have the amazing ability to adjust itself because of the minuscule adjustment of muscles around our eye which enable it to adapt to available light. Our eyes also can see a broader dynamic range of light than our cameras. Dynamic range is the range of exposure from light to dark. We see more shades of light and dark in one view than the camera does, and sometimes when we take a photo in what we think is enough light, the camera gives us a image or makes an adjustment that surprises us. As you grow more experienced as a photographer, you will start to be more sensitive to the amount of light around you, and know the limits of what your camera can do in certain kinds of light.

I personally enjoy the challenges of different lighting, and use it as a reason to look for creative ways to exploit it in my images. To do this, I recommend learning more about shutter speed and its effects on your photos. Also, experiment with your ISO in different lighting conditions. I recently discovered that the human eye has a maximum ISO rating of about 800. Today's cameras are able to go well beyond 800 ISO, which means that cameras are now able to see more detail in the dark than you can!

Overall, keep in mind that the amount of light is always important and will always affect your photos. If you are stuck indoors, try turning on a few more lamps other lights (if you can) to get more light into a scene (you might want to ask before you do this at someone else' s house). You might also want to move your subjects near a window to get a little bit more ambient light from outside. If you are going somewhere where you know the light will be dim and you are photographing relatively stationary subjects, consider a tripod or something similar to help stabilize your camera so that you can use longer shutter speeds.

In our nex post, we are going to talk a little more about the quality of light, and how it can be used to enhance your shots.

Friday, May 08, 2009

Photography Tip # 9: Pay attention to the light

Almost every experienced photographer can tell you that if you don't pay attention to the light, your photographic experience is likely to be miserable. This is because without light, photography is impossible. In fact, the word photography literally means "light writing" or "light painting".

One of the biggest obstacles to people is to understand that light has both a quality and quantity aspect to it. It also has a direction. In order to progress in your quest to improve as a photographer, you need to understand these things. Let's break them down a little more:

Quantity: This is probably the easiest for people to understand. The more light you have, the easier it is for you and your camera to get a proper exposure. However, sometimes too much light can work against you, depending on the kind of shot you are looking at getting. For instance, a nice creamy blur in a waterfall is very difficult to achieve if you are working with lots of light, because of the risks of the exposure being too bright. It is easy to realize that pictures taken in a dark setting can be complicated and sometimes require light from other ambient sources such as lamps, flashes, etc. We will deal more specifically with tips on handling these situations in future posts.

Quality: This attribute of light is sometimes referred to as temperature or color. Light takes on a different color depending on its source and the time of day. For instance, the sunlight during a sunrise has a more pink or golden color to it, while light during a sunset will typically be more orange or red. Incandescent lights in a home normally give off a yellowish hue, while fluorescent lights can have a green or blueish tint. Back to the time of day, the sunlight during high noon tends to be more harsh and direct, resulting in lots of shadows and contrast. Many photographers try to avoid light in these hours because of the less than flattering effects the light makes.

Direction: Its always important to know where the source of light is coming from when you take your shot. Ignoring such things will end up leaving you with unexpected silhouettes of people or harsh and distracting shadows which would draw attention away from your subject. The best way to actively practice with this concept is when taking photos outside, pay attention to where the sun is in the sky. By taking note of the giant light source in the sky and also your subject's location, you will be best prepared for how to set up your shot to look the best based on this knowledge.

This post is really meant to be an introductory tip on light. There have actually been whole books published on this subject alone. The next several posts in this blog will focus on the tips in using light to your advantage in taking various kinds of photos.

Saturday, May 02, 2009

Reader Feedback, and why I need your input.

One of the things that I appreciate most from blogging is the opportunity to get reader feedback on either my ideas, how I'm doing, how much I stink at it (okay, maybe I don't appreciate all the feedback), etc. The last post is a good case in point. One of my readers pointed out something I forgot to add concerning Aperture Priority mode. Here's the comment:

"I've really been enjoying your photography posts, great material! One sub-tip on Aperture Priority mode: this is a good option but, like you discussed in the "Shutter Speed" post, remember to keep an eye on the shutter speed. If the light's low, the camera will set the shutter speed too slow and your shots can end up blurry due to camera shake. You can combat this by adjusting your ISO to keep things in an acceptable range.
"

This is a good tip. I'll actually add to it and say that for most cameras, you don't want your shutter speed to get too slow ever without your choice in the matter. There's a general rule that says that whatever your zoom length is, your shutter speed should be similar. Here's an example:

If you are zoomed out to 55 mm on your camera, your shutter speed should be no lower than around 1/50th or 1/60th a second. Anything slower than this might introduce blur because of camera shake. There are other factors to keep in mind, such as cropped sensor cameras, etc. But I won't get into that here. However, I'd like to thank Brock Martin of Infinet Design for the great tip and reminder.

So, as you can see, I value your input. Whether it be a photography tip, a question, or just general feedback. Keep it coming, and thanks for reading!